
In today’s digital world, 3D Rendering has become an essential skill for professionals in architecture, interior design, gaming, and more. Whether you’re an aspiring designer or a hobbyist, mastering the art of DIY 3D rendering empowers you to bring your ideas to life with just a few clicks. But where should you start?
If you’re eager to dive deeper into DIY 3D rendering, 7CGI offers valuable resources to guide you. Their blog provides expert insights and tutorials to help you get started with 3D Rendering, ensuring that anyone, even a beginner, can create stunning 3D visuals with the right tools and guidance.
Also Read: English Tuition for Secondary: A Path to Stronger Language Skills
In this post, we’ll walk you through the essential steps to kickstart your journey into the world of 3D Rendering. From understanding the basics to choosing the right tools, you’ll have the foundation to create impressive 3D renders independently.
What is DIY 3D Rendering?
DIY 3D rendering involves creating realistic or artistic 3D images of objects, spaces, or environments using computer software. This versatile skill can be applied to everything from architectural modeling to designing virtual products for e-commerce websites. The best part? You don’t need to be a professional designer to get started.
The Basics of 3D Rendering
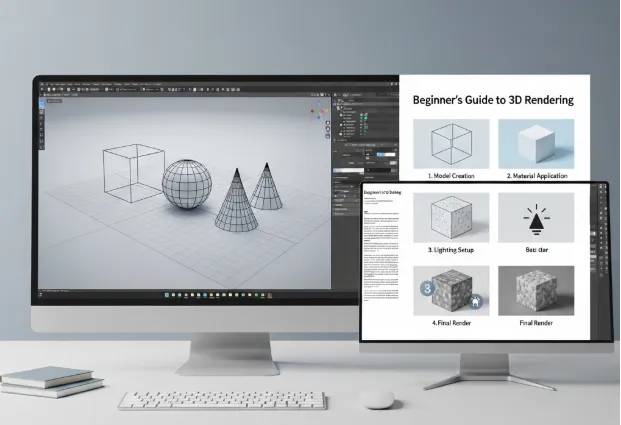
Before diving into tools and techniques, let’s first cover the core concepts of 3D Rendering. This process involves generating a two-dimensional image from a 3D model, where the software considers lighting, texture, shadows, and perspective to create a final render that mimics a real-world scene.
The process includes several stages:
- Modeling: Creating the 3D objects for your scene.
- Texturing: Applying materials and textures to objects.
- Lighting: Setting up lights to replicate real-world conditions.
- Rendering: Generating the final image or animation from your scene.
Step-by-Step Guide to DIY 3D Rendering
Now that you understand the basics, let’s break down the process into manageable steps.
1. Choosing the Right Software
There are many 3D rendering tools available, ranging from beginner-friendly to professional-grade. Free software like Blender is an excellent choice if you’re starting out. It offers powerful features like modeling, texturing, and rendering—all in one tool. Other popular options include SketchUp for architectural designs and Tinkercad for simpler models.
2. Creating Your 3D Model
Once you’ve chosen your software, it’s time to start building your 3D model. Beginners should start with simple shapes and gradually progress to more complex objects. Online tutorials can guide you through specific modeling techniques for your chosen software.
3. Texturing Your Model
Texturing is crucial for making your 3D model look realistic. This process simulates the appearance of surfaces like wood, metal, or fabric. You can use built-in textures from the software or find free, high-quality textures to apply to your models online.
Want to learn more advanced techniques and get step-by-step instructions on DIY 3D rendering? Check out 7CGI’s DIY 3D Rendering Blog for additional insights and tutorials to help you master the process.
4. Lighting Your Scene
Lighting plays a massive role in making your 3D renders realistic. Experiment with different light sources, such as point lights, spotlights, and ambient lights. Adjust the intensity and angle to replicate natural light conditions, creating a lifelike effect.
5. Rendering Your Scene
Once you’re happy with your model and lighting, it’s time to render. Depending on the complexity of your scene, rendering may take anywhere from a few minutes to several hours. Most 3D software lets you preview your render before committing to the final version.
6. Post-Processing
After rendering, you can use image editing software like Photoshop to touch up your 3D render. Enhance colors, sharpen details, or add effects to make your render even more polished.
Tips for DIY 3D Rendering Success
- Start Simple: Don’t overwhelm yourself with complex projects at first. Begin with basic shapes and work your way up.
- Learn from the Community: Join online forums, watch YouTube tutorials, and engage with other 3D rendering enthusiasts. You’ll learn a lot from their experiences.
- Experiment: 3D Rendering is all about trial and error. Don’t be afraid to experiment with lighting setups, textures, and styles.
- Use References: Always use real-world references if you’re designing realistic models. Study how materials look and behave in different lighting for the most accurate results.
Conclusion: Unlock Your Creative Potential with DIY 3D Rendering
DIY 3D rendering is an incredible skill to add to your creative toolkit. With the right software and some practice, you can create stunning 3D models and renders without hiring a professional.
If you’re ready to explore the endless possibilities of 3D Rendering, start small, stay curious, and enjoy the creative process. Whether you’re designing for your home, creating product prototypes, or building virtual worlds, DIY 3D rendering is a skill that can take your creative endeavors to the next level


